Did you buy a new Canon printer and now want an easy way to set it up? This guide will help you through the complete setup process from the beginning. “IJ Start Canon Setup“ helps you download drivers and connect your Canon printer step by step. You will learn how to prepare your printer, download drivers, and connect it to a Windows or Mac computer using Wi-Fi or a USB cable. The official Canon setup page, ij.start.canon gives you the required software and setup steps for your printer model. This blog also covers wireless setup and USB connection, so you can start printing in less time.
Step 1: Unbox and Prepare Your Canon Printer

Prepare your printer before you start the setup process on your computer.
- Open the printer box and remove all items from the package.
- Check for the printer, power cable, ink cartridges or ink bottles, setup guide, and other extra items inside the box.
- Remove all orange tapes, plastic covers, cardboard pieces, and packing materials from the printer body and paper tray.
- Place the printer on a flat and stable surface near a power outlet.
- Connect the power cable to the back of the printer and plug it into the wall socket.
- Turn on the printer by pressing the power button and wait until it becomes ready.
- Open the front or top cover and install the ‘ink cartridges‘ into their matching slots. Push them gently until they lock into place.
- If you use a Canon MegaTank or G Series, open the ink tank covers and fill each tank with the correct ink color. Do not overfill the tanks.
- Next, load a few plain sheets of paper into the input tray.
- Your printer is ready for the next setup process.
Step 2: Download and Install Canon Printer Drivers
Install the printer driver on your computer to connect the printer and start printing, scanning, or copying tasks.
- Launch an internet browser on your Windows or Mac computer.
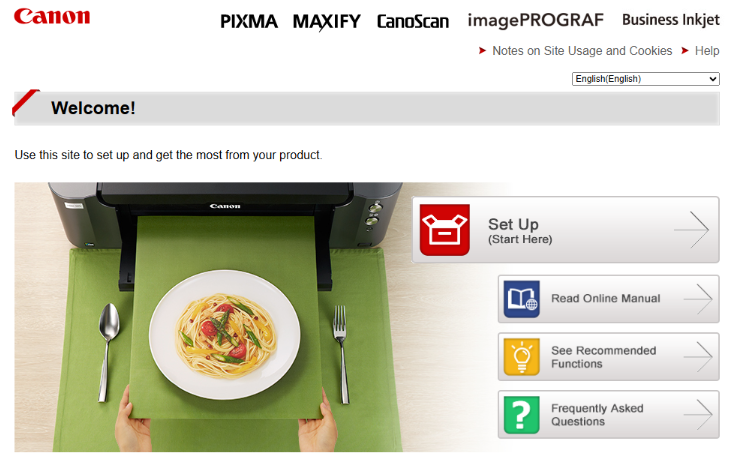
- Visit the official Canon setup website at ij.start.canon.
- On the home page, click the “Set Up (Start Here)” button to continue.
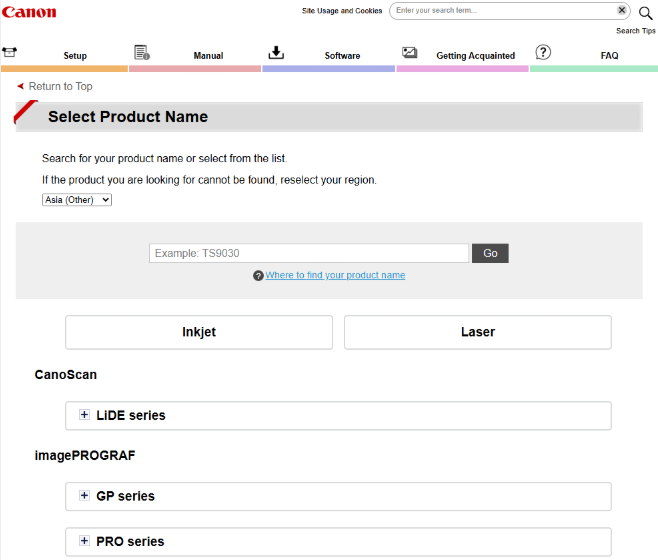
- Type your printer’s name into the search box and select it from the list.
- The website may detect your operating system automatically. If not, choose your Windows or Mac version manually.
- Select the Download button to install the latest Canon printer driver and software package.
- Wait until the setup file finishes downloading on your device.
- Go to the Downloads folder and open the downloaded setup file by double-clicking it.
- Windows users may see a .exe or .msi file, while Mac users may get a .pkg file.
- If your computer asks for permission, click Yes or Allow to continue.
- Follow the steps shown on your screen to install the Canon software.
- During setup, choose either a wired or wireless connection method for your printer.
- Complete the setup process and wait for the installation confirmation message on your screen.
- After setup, print a test page to check whether the printer works on your PC.
Step 3: Connect Canon Printer to Computer Using Wi-Fi or USB
Connect your printer to your PC through a Wi-Fi network or USB cable to start printing and scanning tasks.
Method 1: Wi-Fi Connection
- Turn on your Canon printer and place it near your Wi-Fi router and computer.
- For a wireless setup, press and hold the ‘Wi-Fi button‘ on the printer until the wireless light starts flashing.
- Open the printer’s control panel and go to Wireless LAN Setup or Wi-Fi Setup.
- Select your Wi-Fi network name from the given list shown on the printer’s screen.
- Enter the ‘Wi-Fi Password‘ and continue with the setup process.
- Wait a few moments until the ‘Wi-Fi light stops flashing‘ and becomes stable. This shows that the printer is connected to the network.
- During the Canon printer setup process on your PC, choose the Wireless Connection option when asked.
- Follow the instructions shown on your computer’s screen to complete the connection process.
Method 2: USB Connection
If the wireless setup does not work, you can also use a USB cable connection.
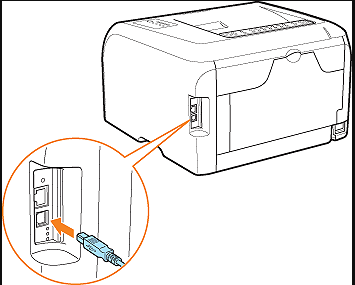
- Turn off the printer and your computer before connecting the USB cable.
- Plug the square side of the USB cable into the printer and connect the flat side to your computer.
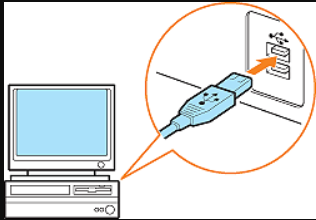
- Turn on the printer and computer again.
- Open the Canon setup program and continue with the USB connection steps shown on the screen.
- After setup, print a test page to check whether the printer connected successfully to your PC.
Conclusion
IJ Start Canon Setup makes it simple to install Canon printer drivers and connect your printer through Wi-Fi or USB. Once the setup is complete, you can start printing, scanning, and copying from your Windows or Mac computer without difficulty. Always download drivers from the official Canon setup website for safe and correct installation.
Frequently Asked Questions (FAQs)
Can I Setup a Canon Printer Without a USB Cable?
- Turn on your printer and press the Wi-Fi button until the light starts flashing.
- Open the printer Wi-Fi settings and select your home wireless network.
- Enter the Wi-Fi password on the printer’s screen if asked.
- Download the Canon PRINT app on your smartphone.
- Open the app, add your Canon printer, and follow the steps to finish the wireless connection.
How Do I Download Canon Printer Drivers?
- Check your Canon printer model name from the front or top of the printer.
- Open the Canon setup website on your browser at ij.start.canon/connect.
- Type your printer model number into the search box and select it.
- Choose your Windows or Mac version from the list.
- Download the recommended driver package file.
- Open the file and follow the instructions to complete the installation.